Category: DIY
Rubik’s Cube Costume | DIY
Hello
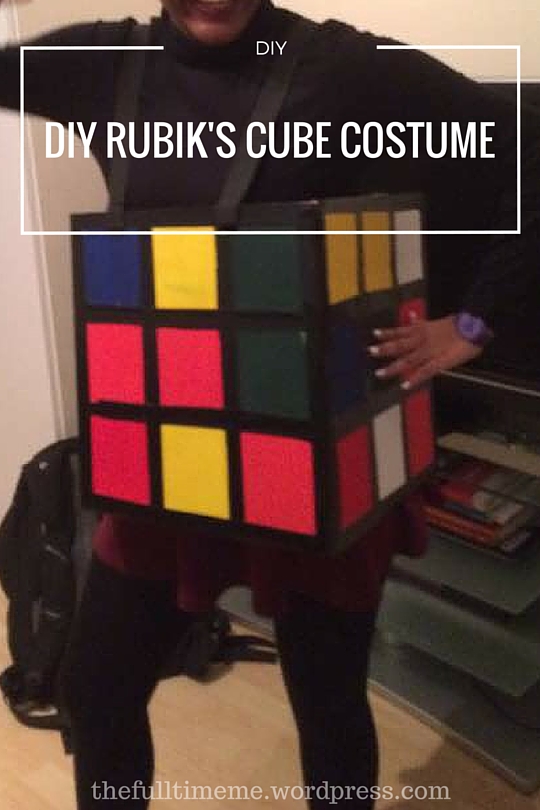
Today I’m going to show you how I made my Halloween costume this year, a Rubik’s cube! I am by no means claiming this as my original idea, because there is no way that i would have come up with this on my own. I got my inspiration from where i get it all from, namely Pinterest I’m sure you’ve heard of it! Without further ado, here is the tutorial:
The things you will need are:
- Cardboard box
- Black duct tape
- Colored paper (6 different colors, but 5 will do)
- Black elastic band (the thicker, the more comfortable)
- Needle and thread
When you have all the things gathered, we can get started on the first step…
1| Assemble the box
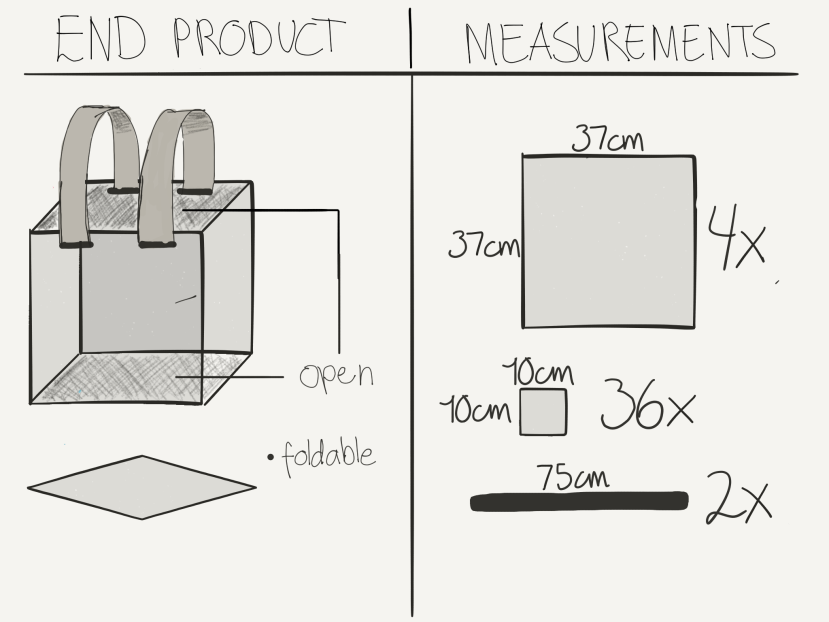
Now, this step would have been easier for me if I had a box where all the sides where the same. However, I could only get my hands on a rectangle box. Therefore, i took the long way around and cut 4 equal pieces (see exact measurements in the illustration below) out of the first box, to make a new one.
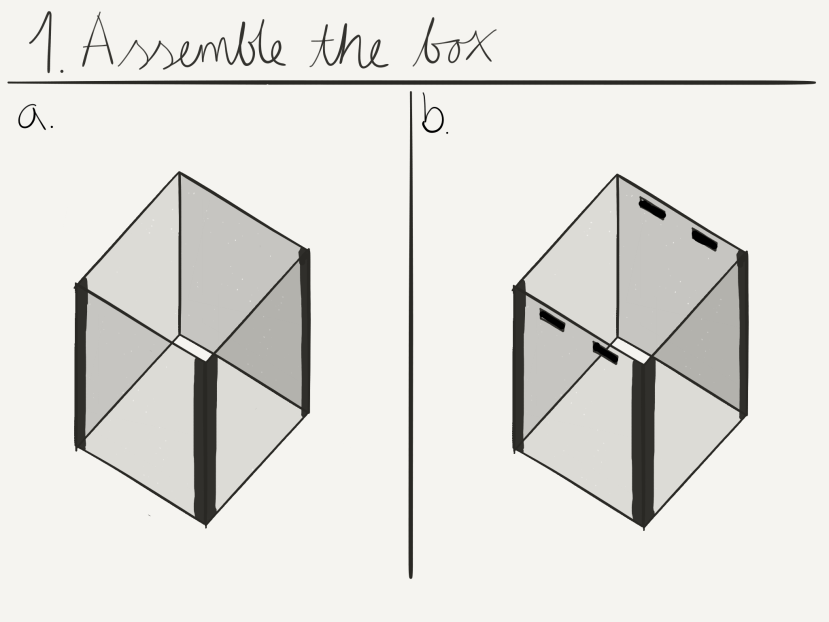
a. After cutting the pieces you need to tape all the pieces together to form a box without a top and bottom. The reason why I’m making it topless and bottomless is because that way it is easier to fold, and therefore easier to transport. I opted for this because the last thing I want to do is to take the bus either wearing or carrying a big colorful box.
The ideal would be to show you pictures of the process, however I neglected to take any as I was to preoccupied and excited to stop and take pictures. Nonetheless, there is no need to fret as I illustrated all the steps on one of my favorite apps called Paper by 53. That way it will be easier for you to follow, instead of going by my poorly written explanations and instructions!
b. For the second part in assembling the box, you need to make holes where you want the straps to go. The holes are going to depend on the width of your straps. My straps were about 2,5 cm in width, so I made the holes a little bigger than that. Hope my illustrations aren’t too hard to comprehend!
2| Add the details
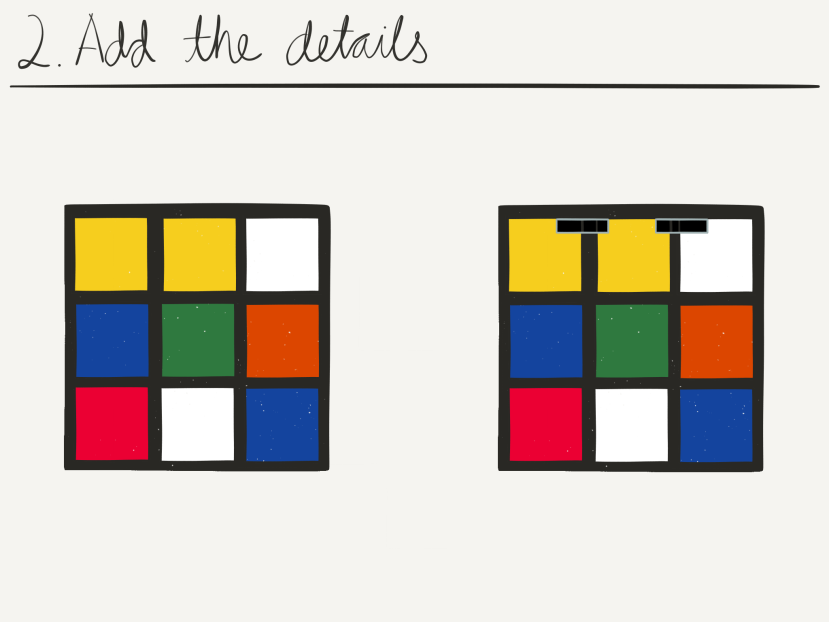
For the details that turn the regular cardboard box into a Rubik’s cube, you need colored paper. In total, you will need 36 squares, 9 for each side. I chose the original colors(red, orange, yellow, green, blue and white), but feel free to use whatever colors you want.
This step is pretty straight-forward as you only need is to first glue on the squares, then tape around them to make the black borders. However, you need to alter some of the squares as they might cover the holes for the straps. It should be harder than snipping of a corner or two. This is also why we made the holes before adding the details; so you wouldn’t have to cut both the cardboard and the squares in one go as this might be difficult.
3| Attach the straps
For straps I though that elastic bands would be the most comfortable. The wider the band, the more comfortable it’s going to be on your shoulders. Now, this might be the trickiest part, especially because my drawing skills only go so far. That is why i have to resort to words instead. Okay, here we go! First, thread the band through the hole. Then you roll the band so the frayed edge is facing the band again. This is to keep the frayed edge from more fraying. If you look at the illustration for reference, you’ll see that the fold is facing outwards, but that’s how I ended up doing. It would be ideal to hide the folds, like you normally would. The illustration is a minor fault on my side, but i hope it gives you an idea of how to do it.
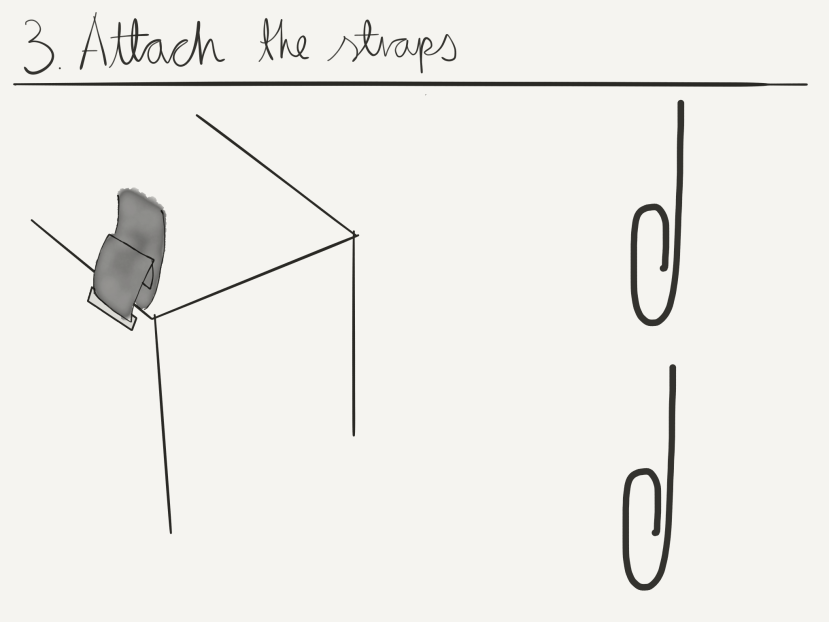
NOTICE: the folds are facing outwards in the picture, but it would be ideal to have it facing inwards. Minor fault on my side!
How I wore it
Now, it’s obvious that you can’t wear the box alone, so this is what i paired it with. I went for dark colors that wouldn’t disrupt the colors I already had going on, so for the top I wore a black turtleneck. For the bottom, I wore a burgundy skirt and black knit tights. For shoes, I chose a pair of heeled ankle boots.
And there you have it! A costume that is guaranteed to have people complimenting and asking “Did you really make that yourself?” Most importantly I hope that my illustrations was helpful rather than making it more confusing.I hope you have a wonderful Halloween with lots of candy and great costumes.
Lastly, thanks for reading!
Sincerley, Beulah
